What are we going to build?
In this article I'm going to show you how to build a table with an ability to rearrange rows in it. 👇
What we need for that?
Angular CDK
All the functionalities we need for the draggable table are bundled inside the Angular CDK package. Let's install it first of all:
npm install @angular/cdkWhen the Angular CDK package is installed in your project it's a time to understand what exactly we're going to use from the package.
Angular CDK Table Module
Since we're building a draggable table, the first thing we need is table 🙄. Angular CDK Table Module allows us to build powerful tables easily. Let's take a look at how to do that.
First of all, we ought to import the Angular CDK Table into the AppModule:
import { NgModule } from "@angular/core";
import { CdkTableModule } from "@angular/cdk/table";

@NgModule({
  imports: [CdkTableModule],
})
export class AppModule {}
CdkTableModule allows us to use basic tables primitive directives: cdk-table, cdkColumnDef, cdk-header-cell, cdk-cell, etc. Let's discuss, how to use them.
Create Table
We need to create a table itself. Let's add a plain HTML table and mark it as the Angular CDK Table using cdk-table directive:
<table cdk-table></table>Next, we need to configure the table structure. We can do so using directives provided by the CdkTableModule. Let's configure each piece one by one:
Header row configuration
Header row can be configured using cdk-header-row. This directive will let cdk-table understand that it's a template for the header row. Then, we're adding a cdkHeaderRowDef directive. It receives a list of columns to be shown.
<tr
  cdk-header-row
  *cdkHeaderRowDef="['position', 'name', 'weight', 'symbol']"
></tr>
Table row configuration
A table row can be configured using cdk-row. This directive will let cdk-table understand that it's a template for the table row. Then, we're adding a cdkHeaderRowDef directive. It receives a list of columns to be shown.
<tr
  cdk-row
  *cdkRowDef="let row; columns: ['position', 'name', 'weight', 'symbol'];"
></tr>
Table cells configuration
Now, it's a time to configure table cells:
  <ng-container cdkColumnDef="position">
    <th cdk-header-cell *cdkHeaderCellDef> No. </th>
    <td cdk-cell *cdkCellDef="let element"> {{element.position}} </td>
  </ng-container>

  <ng-container cdkColumnDef="name">
    <th cdk-header-cell *cdkHeaderCellDef> Name </th>
    <td cdk-cell *cdkCellDef="let element"> {{element.name}} </td>
  </ng-container>

  <ng-container cdkColumnDef="weight">
    <th cdk-header-cell *cdkHeaderCellDef> Weight </th>
    <td cdk-cell *cdkCellDef="let element"> {{element.weight}} </td>
  </ng-container>

  <ng-container cdkColumnDef="symbol">
    <th cdk-header-cell *cdkHeaderCellDef> Symbol </th>
    <td cdk-cell *cdkCellDef="let element"> {{element.symbol}} </td>
  </ng-container>
The most important part here is cdkColumnDef. It says which column we're configuring. As you remember, we just told the Angular CDK Table that we'll have the following columns in the table: ['position', 'name', 'weight', 'symbol']. Now we're using cdkColumnDef="name" to tell the table which column we're configuring here. We have pretty similar configurations for all columns. Let's dive inside columns templates.
Inside each column definition, we have two lines: one for the header cell or th and one for the row cell or td.
<th cdk-header-cell *cdkHeaderCellDef>Name</th>This line configures a header cell for the name column. It tells the table that it's a header cell via cdk-header-cell directive. And marks it as a cell template with *cdkHeaderCellDef.
<td cdk-cell *cdkCellDef="let element">{{element.name}}</td>While this line configures how the table row cell will look like. cdk-cell marks this element as a table cell. And *cdkCellDef="let element" directive marks it as a template and provides the link to the active row element.
But where we'll get those elements? Right now we have only the template and nothing similar to data! Hmm. The Angular CDK Table operates with the concept of datasource.
Datasource
What is Angular CDK Table data source
The data source concept describes how you can provide data to the Angular CDK Table. It can be done in three ways:
The simplest way is to use a plain javascript array. It ought to contain objects. And in that case, each object represents one table row.
Using
Observable. In that case, you ought to provide a stream of arrays. The table will rerender each time thatObservableemits a new array. (We'll use that approach for the data source in this tutorial).Using
DataSourceobject that implementsDataSourceinterface that containsconnect/disconnectfunctions. This approach is useful for more complex scenarios. Especially in cases when you need to clean up our data stream. This can be done usingdisconnectfunctionality.
How to attach data to the table?
First of all let's create an array with data:
export class AppComponent {
private items: PeriodicElement[] = [
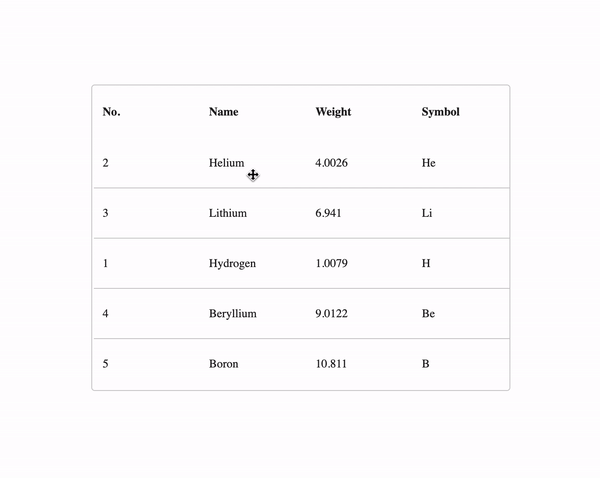
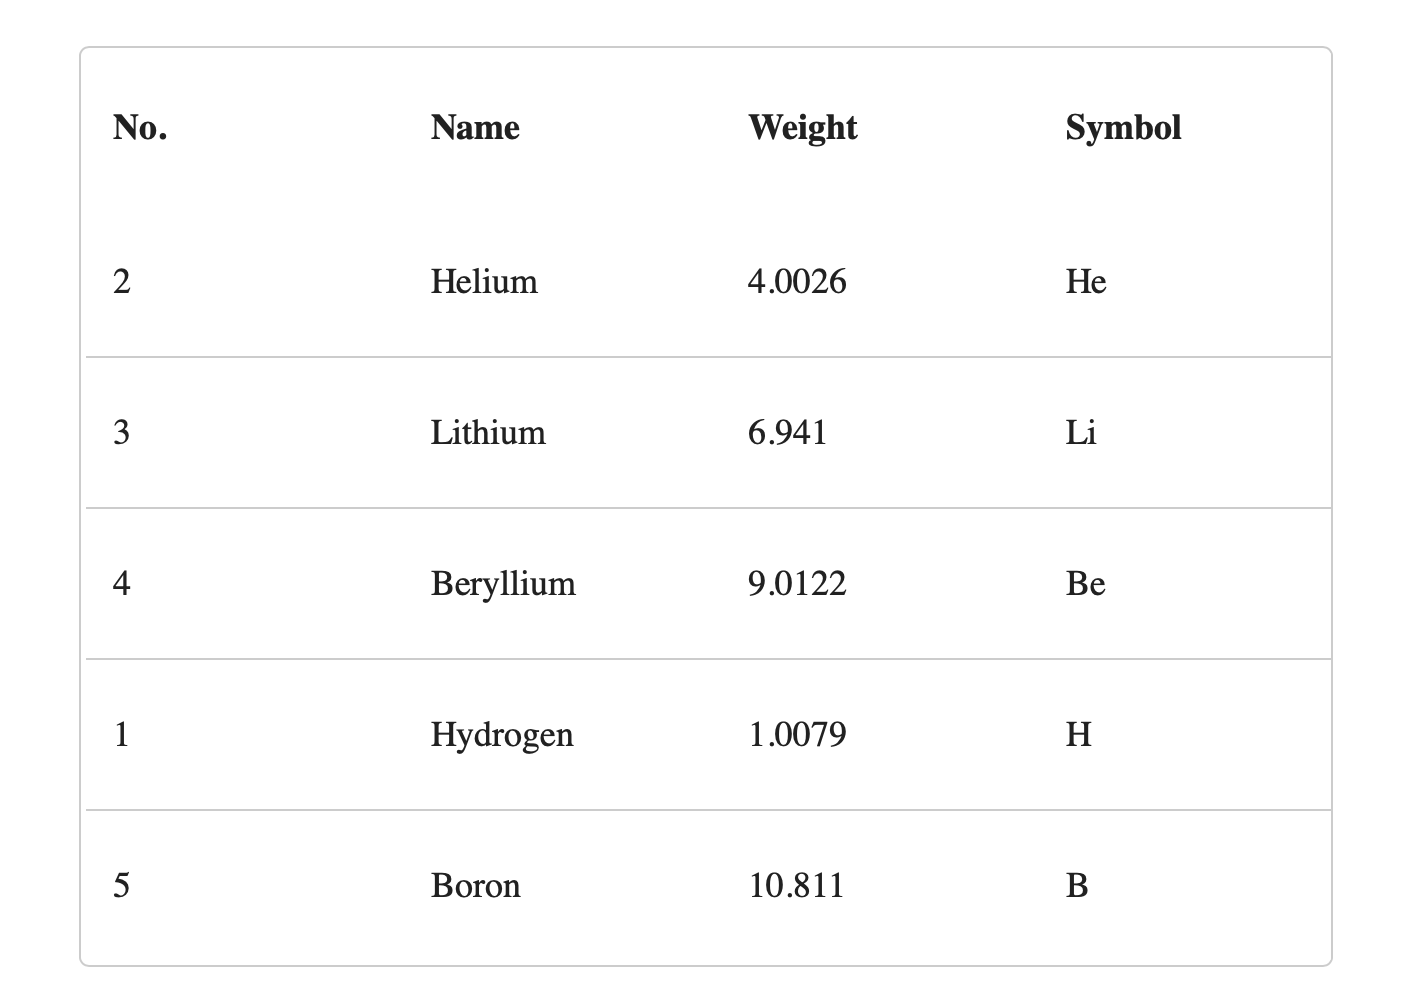
{position: 1, name: 'Hydrogen', weight: 1.0079, symbol: 'H'},
{position: 2, name: 'Helium', weight: 4.0026, symbol: 'He'},
{position: 3, name: 'Lithium', weight: 6.941, symbol: 'Li'},
{position: 4, name: 'Beryllium', weight: 9.0122, symbol: 'Be'},
{position: 5, name: 'Boron', weight: 10.811, symbol: 'B'},
];
}Then, we ought to push that data into the subject. That's required since we're going to change the order of rows during the drag and drop.
export class AppComponent {
  datasource = new BehaviorSubject(this.items);
}
After that, when we have a stream of data we ought to connect it to the table:
<table [dataSource]="dataSource"></table>
And that's it. Now we have a table and a data source connected to it. Now it's a time to make it draggable!
Adding Drag & Drop
All the functionalities we need for the drag and drop are bundled inside the Angular CDK DragDrop module. So, let's import it first of all:
import { NgModule } from "@angular/core";
import { DragDropModule } from '@angular/cdk/drag-drop';

@NgModule({
  imports: [DragDropModule],
})
export class AppModule {}
When DragDropModule is installed it allows us to use cdkDrag and cdkDropList directives inside our templates to make elements draggable. Let's see how it works.
cdkDrag
<tr cdk-row *cdkRowDef="let row;" cdkDrag></tr>This is a table row we defined a few minutes ago. But now I added a cdkDrag directive here. This directive makes an element draggable.
cdkDropList
The next step is to define the container for draggable elements. Since in our case we're going to rearrange table rows, that means our draggable elements container is our table:
<table cdk-table cdkDropList (cdkDropListDropped)="drop($event)"></table>I've just added cdkDropList directive here. It marks the table as a draggable elements container and allows us to intercept drop events using cdkDropListDropped directive output. So, when the user releases an element somewhere on the table we'll receive that drop event. Then, we'll be able to react on it and rearrange the data in the table's data source.
So, as you can notice above I've added drop callback to the cdkDropListDropped event. Let's implement it to make our table finally rearrangeable!!
import {CdkDragDrop, moveItemInArray} from '@angular/cdk/drag-drop';


export class AppComponent {
  drop(event: CdkDragDrop<string[]>) {

    // Rearrange the data in the array
    moveItemInArray(this.items, event.previousIndex, event.currentIndex)

    // Publish a new version of the data into the datasource
    this.dataSource.next([...this.items]);
  }
}
What's going on here? We're just receiving a CdkDragDrop event. It contains all the required information to move the item. It has a previousIndex and a currentIndex of the item that was moved visually by the user. Then, we can move it from the previous place to the new place using the moveItemInArray function provided by the Angular CDK DragDrop module.
And finally, we're just publishing a new version of data to the table! Easy as that! And here is the result 👇
Recap
At this tutorial, you learned how to make rearrangeable tables in Angular using Angular CDK Tables and DragDrop modules. I hope you get all the details and liked the article. If you have any questions, please, let me know on twitter, I'll try to help you.
If you're interested in more content about Angular CDK, follow me on twitter and subscribe to my newsletter 👇

Personal blog by Nikita Poltoratsky
I explain concepts with code